Yeah, its frustrating. But I also knew from the get-go that it was a gamble. I didn't want to risk painting the car, but a headliner is easy enough to re-do!
--------
Man, what a roller coaster night of frustration.
I started off by bleeding the brakes, which should have gone relatively easy. I've got Russell Performance Speed Bleeders on every corner, so with long sections of clear tubing you can bleed the brakes single-handedly. To start the process I always crack one front and one rear caliper, to ensure the master cylinder can push fluid through both circuits. Within moments I could hear fluid hitting the front pan. "That's odd", I thought, "Its usually not that quick." I walked over to the front corner, and fluid is leaking
everywhere. Initially I didn't panic...I probably forgot to tighten a fitting or something. But scanning for the source quickly turned to panic and annoyance. How could I possibly have a brand new caliper leaking at the seam between halves!?! I'm mopping up fluid, trying to find tools to remove the caliper when it dawns on me...these calipers have two bleed nipples (to be used on either left or right sides). Um, where is the other bleed nipple?
Ah yes, when you take a nipple with you to the store to ensure you buy the right speed bleeders...PUT IT BACK! :P
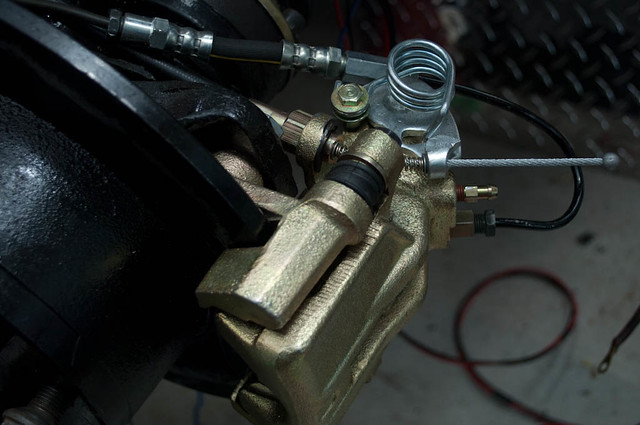
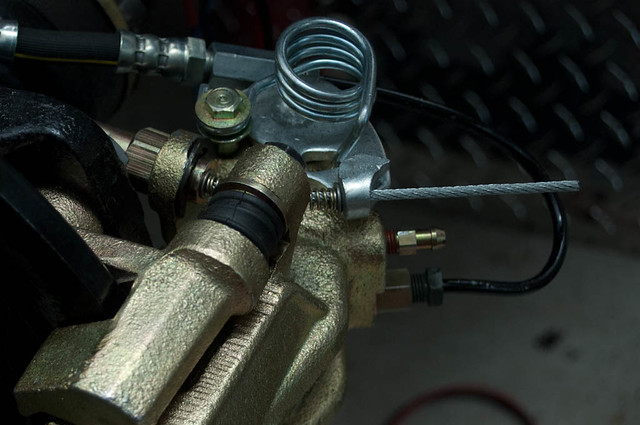
With that done, I continued to bleed the brakes. The fronts came up quickly, and easily...but the rears, just would not bleed. I needed to wait until I had someone to work the pedals so I could see what was going on. With that, I moved on. As you can see the handbrake cables I have are quite a bit longer then ideal. When I put the same rear brake kit on my '69, I had the same issue. But the cable housing measures out correctly. I could spend time trying to find ones that are the correct length, or I could fix what I have.

First step, cut off the end ball, and remove the cable and housing from the car.

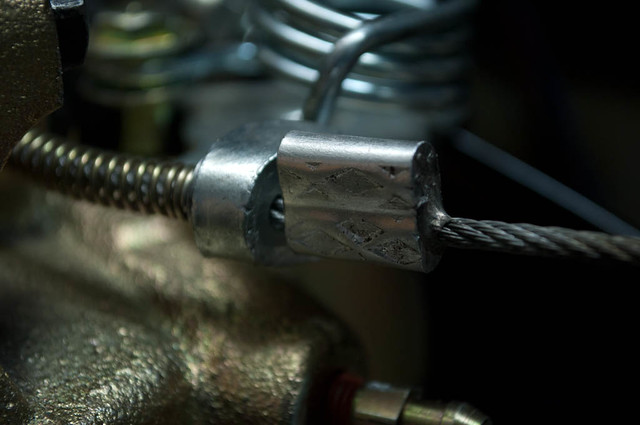
Next up, I use a cable crimp on each cable. These are crushed on using my vice, and then I solder the housing for extra measure. With that done, you simply reinstall in the car. The clamps hold to the use of the parking brake, and my final step is to heat-shrink the end of the cables so that they don't fray. Its not the most elegant solution, but it's functional.


Funny enough, I've never actually owned a beetle with a properly installed E-Brake boot. Seems they're always torn in some fashion. I highly doubt the Empi one fits properly, and I can't seem to get it to 'snug down' to the tunnel. But I figured I would try the silver out. I won this at a show years ago, and I remembered thinking "When am I
ever going to even
think of using this in a car!?!" Funny enough, it fits the theme of this one :P

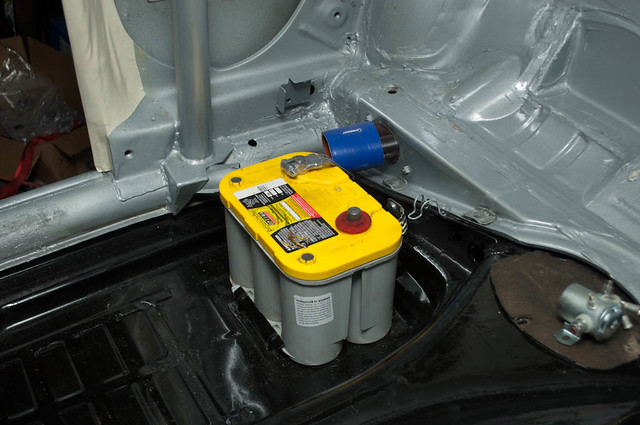
With the brakes completed as far as I could get them, I thought I'd quickly toss the battery into the car. I'd
really like to know how I had this thing mounted in my '69 beetle...because it sure doesn't fit this car! The first problem was base...I knew that would be easily solved by finding the additional pieces Optima ships with the battery...but finding them in the garage was another story. Once I finally tracked them down, the battery fit under the "lip", but there was no way I could bolt it down. A bit of time with the angle grinder and one of the plastic mounts...and it was finally mounted. FAR too long for something as simple as the battery!

Thankfully my buddy Scott stopped in, so that meant the two of us could do some 'two-man' jobs. We started on the fuel level sender. I now have the O-Ring, so it's just a simple matter of pressing down and tapping the sender home, right? Okay, seriously. I swear we spent an hour on this. It's been greased, boiled, what-have-you, and will NOT go in. I'm going to have to find the measurements and check that the O-Ring packed was the correct size, because this is ridiculous.
We did, however, manage to bleed the brakes relatively successfully. They aren't perfect, but with all the fluid I ran through we were getting to the end of my stash. Letting the brakes sit for a few days isn't a bad thing either, so hopefully I can get the last of the air out in short order. At least I know there aren't any major issues with any components, and outside of my bleeder mistake, all my fittings were leak free from the start.
To finish the evening, I went back to my wiring. At least I know that's usually successful! I was busy working out the battery cut-off solenoid, along with starter and alternator wiring, when I discovered a new problem. My Autostick starter doesn't fit the Porsche gearbox. The diameter of the mounting face is off. Sigh. You can just see the space between the upper lip and the transmission, but suffice it to say I'll be either working the starter in the lathe, or working the trans to make it fit.

Ah project cars...always fun eh? :P
-Dave