
|
|
|
|
#1
 April 13th 2009, 17:21
|
||||
|
||||
|
Fitting a G50 in a bug chassis....
I'm doing it quite differently to Wally, mainly (as he loves to say! ;-)) due to the Subaru engine I'm going to use.
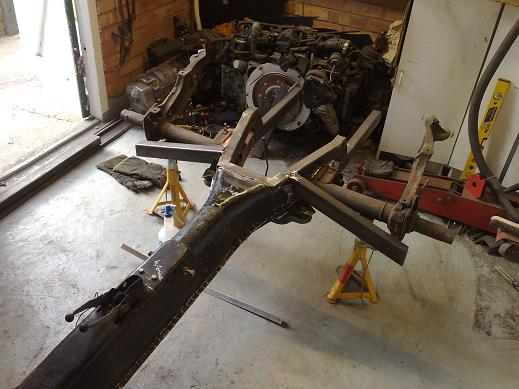
Using the bug trans bellhousing face as a datum, I am moving the trans 70mm forwards and 25mm up to give me a bit more ground clearance too. I'm using a short nose G50. Started cutting.... 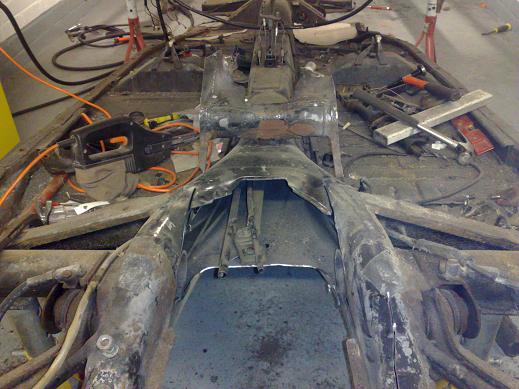 And some more and the trans can be located, You can see I made up a temporary method of fixing the position of the rear of the transmission 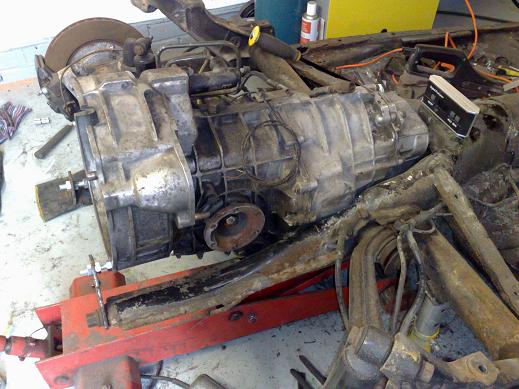 Loads of space on the left hand side 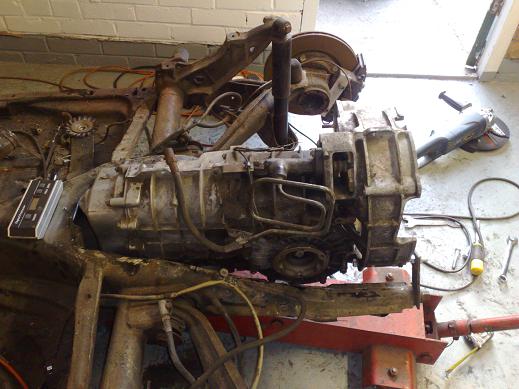 Now front mounts welded in No going back now! I wasn't happy with how much had been cut out of the right side framehorn so I decided to make up new stronger framehorns. 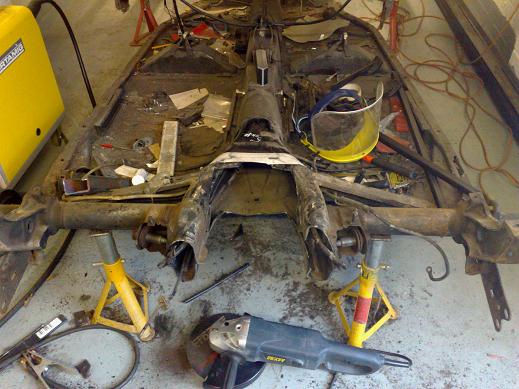 Central splined section now cut up and reversed and rewelded further out inside the torsion housing, this way I can use the shorter torsion bars from a swing axle car. 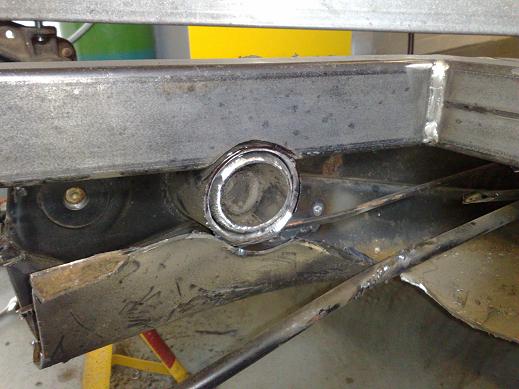 Skip forwards a few steps... 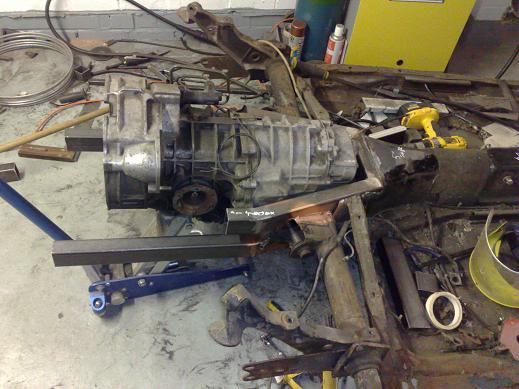 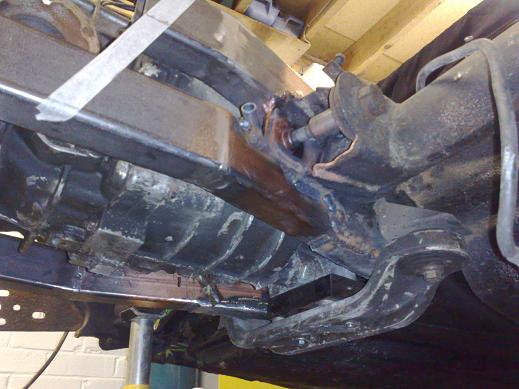 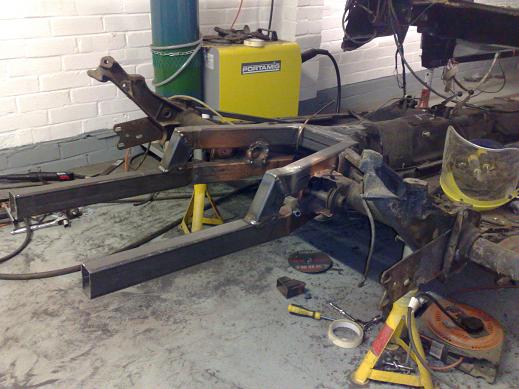 I'm now making up a much stronger floor, but that's another story! 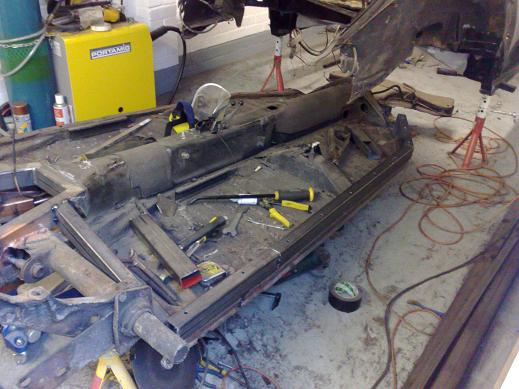 Rich
__________________
http://www.ricola.co.uk 
|
|
#2
April 15th 2009, 20:42
|
||||
|
||||
|
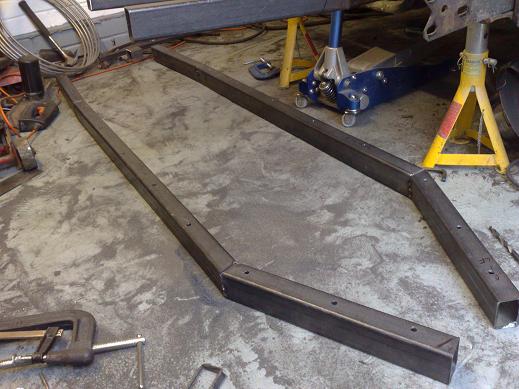
Rich,
I am at the same spot you are, fabbing up my cage. I am really interested in your new "Floor rails". Is there anyway you can post a photo of that new "Rail" you have sitting on the chassis from the top down? With the specs for the materials. it is the next part that I need to make. thanks for posting photos of your build.
|
|
#3
April 15th 2009, 21:42
|
||||
|
||||
|
That's looking good Ricola. Keep up the great work!
__________________
1970 T1 W/MassIVe 2913cc RAT/?EFI? w/direct fire (very soon) and 915 trans  1962 SC 1776cc SP 944NA brakes, 993 wheels VKG
|
|
#5
April 16th 2009, 07:17
|
||||
|
||||
|
I like your work! It's great to see the same thing done 2 different ways (yours and wally's), and both done so well. At least for me it's verry inspirational.
Keep the pics coming
__________________
www.vw1303s.com
|
|
#7
April 20th 2009, 05:41
|
||||
|
||||
|
Nice looking start to the chassis Rich. One point you may wish to consider is removing the front seat support and substituting a crossmember to which you can bolt the floor pan. The crossmember itself will add considerable torsional stiffness and when combined with the floor pan the whole thing will be even stronger, which can't be a bad thing with a cab body?
(I see that your looking to lower the C of G with all that RHS tubing??? LOL) Clive
|
|
#8
April 20th 2009, 05:51
|
||||
|
||||
|
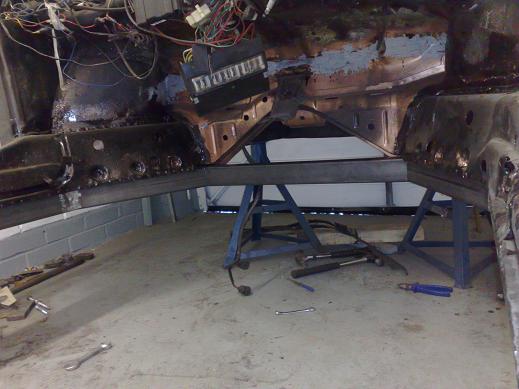
I've done more than remove the seat support, the original floors have gone in the scrap bin! I plan to use similar tubing for the front and rear seat mounts that will tie in the tunnel to the side members of the chassis. I'm toying with getting the whole lot galvanised when I'm done too. The whole lot is not that heavy surprisingly
 A bit more done now... Put the body on the chassis to get everything aligned perfectly before welding it all together 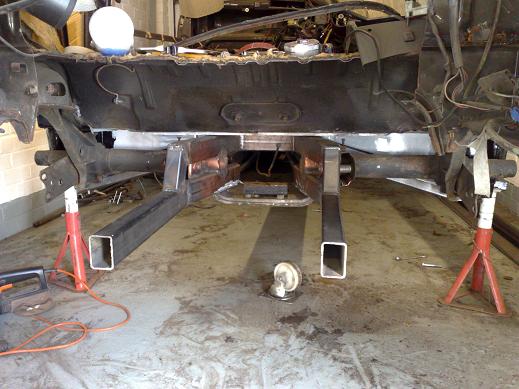 Years of bodges! Several plates, filler and pidgeon **** welding. 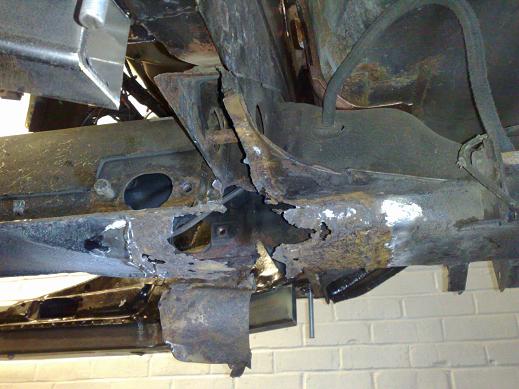 Front end together, nearly ready for welding... 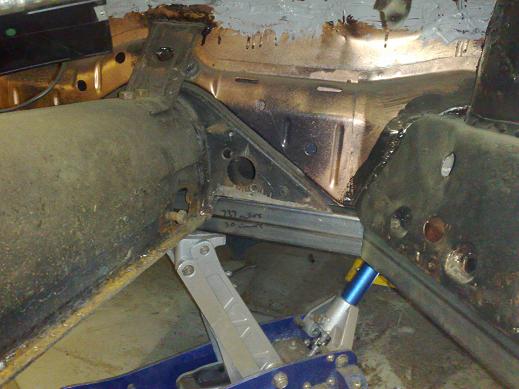
__________________
http://www.ricola.co.uk
|
|
#9
April 20th 2009, 06:15
|
||||
|
||||
|
I'd stay away from the galvanizing - there are too many horror stories of distortion. Even Land Rover chassis's have that problem. You could shot blast it and epoxy coat it for a very durable and repairable system?
|
|
#10
April 20th 2009, 06:59
|
||||
|
||||
|
I'm not concerned about the exterior, it's more for the internals. There's a locla kit car company that has their chassis galvanised, I can ask them about distortion. By the time I'm done it's going to be very stiff!
__________________
http://www.ricola.co.uk
|
|
#11
April 20th 2009, 09:07
|
||||
|
||||
|
As I understand it the thinner the metal the more susceptable it is to distortion. The hot dip galvanizing process seems to release all the stresses within the metals, which is more apparent with welded/fabricated units. The heating/cooling induced (welding) stresses need to be fully balanced in production to prevent untoward distortion. Land Rover chassis's for example are built of 3-5mm plate that is immensely strong but the galvanizing process turns it all into butter - Land Rover won't for that reason galvanize their chassis. Looking at your chassis build which looks very strong for the application I would be concerned that it would still distort. You could try it but it would be a shame if after all your excellent work if it did distort.
|
|
#12
April 20th 2009, 09:28
|
||||
|
||||
|
Fair point, I've never had anything done personally so am not fully aware of all the pitfalls, a mate mentioned it to me over the weekend. I've seen some floorpans distorted by other dipping processes but I was thinking of doing it pre floor fitment. Thinking about it most of the internals of the tunnel are still remarkably well coated and I should be able to get access to any new uncoated areas OK. I've got lots of brackets etc etc to fit before it becomes a real issue too so no rush...
__________________
http://www.ricola.co.uk
|
|
#14
April 21st 2009, 04:23
|
||||
|
||||
|
I haven't measured, it is not ideal but then plenty of people run lowered cars and the CVs don't care if the change is up/down or forwards/backwards. I'll use 944 CVs/axles to start with and if I feel I want less angle I'll switch to early 944 ally arms as they position the hub further outboards with longer axles and I'll use 930 CVs.
__________________
http://www.ricola.co.uk
|
|
#15
April 21st 2009, 11:04
|
||||
|
||||
|
Nice fabrication work Richard! (no, really
)Quote:
Besides, ever looked at the axle angles of an original manual VW412? The tranny in there is placed (much) further forward originally!!! Hence it also has angled axles and stock 100mm CV's. That obviously was done because of a better weight transfer. So we're just following the factory in its thinking really  Just FYI 
|
 |
| Currently Active Users Viewing This Thread: 1 (0 members and 1 guests) | |
|
|


 Hybrid Mode
