
|
|
#212
 August 6th 2011, 20:00
|
||||
|
||||
|
Every time you post updates it makes me go searching for my own late 'vert. Keep up the amazing work!

__________________
Lucy: 73 super beetle sport bug edition, 944 turbo suspension, 930 turbo brakes, 2165 FI, dry sump, turbo 
|
|
#214
August 7th 2011, 16:39
|
||||
|
||||
|
Cheers guys
It's all in the details! I think if it looks like it could have been factory then I've done my job...Bruce: look back through the thread or on my site, it's a flush mounted chopped down and reshaped Kamei, I'm not keen on the look of the stock Kamei, bit too 'snow plough' for me..
__________________
http://www.ricola.co.uk
|
|
#216
August 8th 2011, 09:17
|
||||
|
||||
|
Very nice job on the dash. All you work looks nice.
__________________
NO_H2O 72 1302 Smack Black GL 73 Bus (2L CIS Powered) 66 Beetle, 73 Standard Beetle 72 Pinzgauer 710M Volksport Kafer Gruppe
|
|
#217
August 8th 2011, 11:55
|
||||
|
||||
|
Quote:
__________________
http://www.ricola.co.uk
|
|
#218
August 8th 2011, 17:25
|
|||
|
|||
|
The custom shaped wings really make a difference there and keep the look integrated.
Perfect "stance", especially with proper suspension travel, geometry and alignment really sets this car at the top of the pile. Found the spoiler details, very helpful. Thanks. Will you mount it flush or use a slim rubber beading (oem wing beading?) to give a nicely finished join?
|
|
#219
August 8th 2011, 23:42
|
||||
|
||||
|
Looking really really good Rich, keep up the updates.
Jason
__________________
If I could just get paid for my sleepless nights.... 1960 VW Bug UBRDUB Walkaround 1st Drag Run Dyno Run Oval Ragster-'57 Rag/'04 Boxster S
|
|
#220
August 9th 2011, 13:20
|
||||
|
||||
|
Quote:
__________________
http://www.ricola.co.uk
|
|
#221
August 17th 2011, 16:50
|
||||
|
||||
|
I've cut into the wiper box cover to build a housing for the heater matrix. The corner piece had to be clearanced for the wiper mechanism and the tube connects straight up to the stock air ducting so all the stock dash controls can still be used.
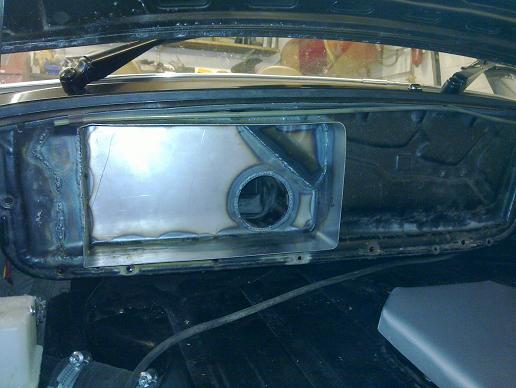 Fiat cinquecento heater matrix in place, note the neat positions of the connections down the side of the car. 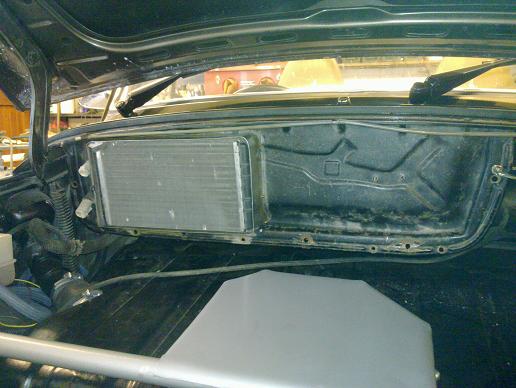 I initially planned to fit the stock fresh air blower fan roughly in the position shown but when connecting it up to a spare battery it was more a breeze than a decent flow. 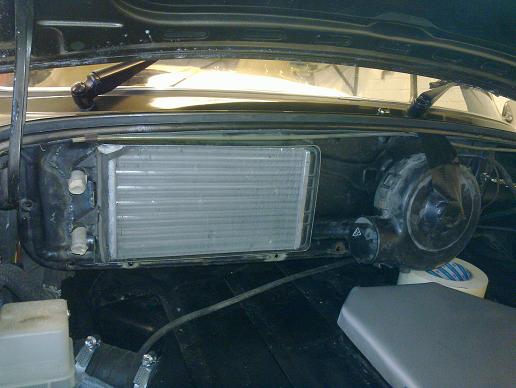 This is the polo heater blower which gave much better flow and will also be easier to mount up to the matrix. 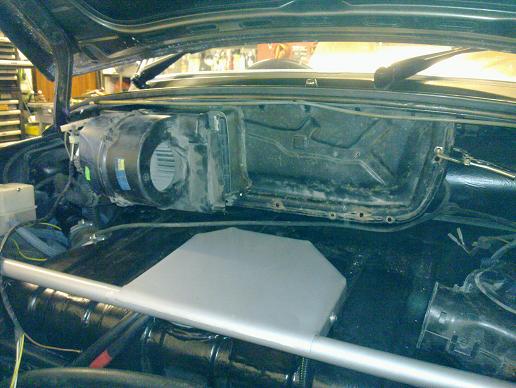
__________________
http://www.ricola.co.uk
|
|
#222
August 17th 2011, 20:56
|
||||
|
||||
|
Very nice (as always) fab and placement with the heater core...cold weather coming soon.
__________________
1970 T1 W/MassIVe 2913cc RAT/?EFI? w/direct fire (very soon) and 915 trans  1962 SC 1776cc SP 944NA brakes, 993 wheels VKG
|
|
#223
August 22nd 2011, 18:14
|
||||
|
||||
|
Hi Rich
I like what you've done with placing the heater core there. Will you run heater hoses from the motor up to it or run them off the radiator hoses. You have me rethinking my my air con setup. Steve
__________________
STI powered 1303 in the works.
|
|
#224
August 23rd 2011, 15:30
|
||||
|
||||
|
Hi Steve,
With my external thermostat the bypass from that becomes the heater feed which I have run under the car (initially in the heater channel but changed my mind) and the return T's into the main return from the radiator under the car. I also picked up a type 25 heater switch which is 3 position to suit the polo blower, the original switch is only 2 speed. It's all in the details! Rich
__________________
http://www.ricola.co.uk
|
|
#225
September 4th 2011, 14:52
|
||||
|
||||
|
Just to confirm the flow would be sufficient before finally plumping with the polo blower fan.
 Here's the back face of the reworked bulkhead panel, the silicone pipe fits straight over the stock interface for the old fresh air blower motor. It was all given a good coat of epoxy mastic 121 as it will be very exposed to the elements...  All in and works very well! I fitted a short section of Rover 100 heater pipe as it has a neat moulded in bleed screw. 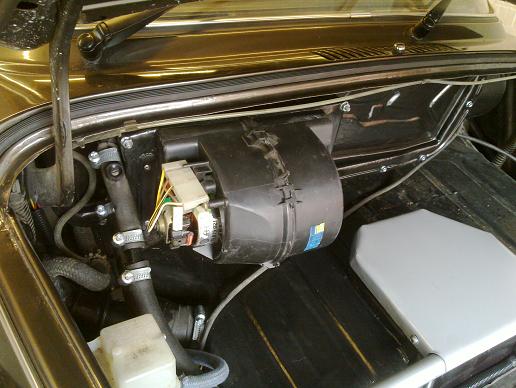 Under-bonnet parts all done now. I had to modify the windscreen.headlight washer tank to fit over the radiator cover. I will probably also make some finishing panels before carpeting this area. 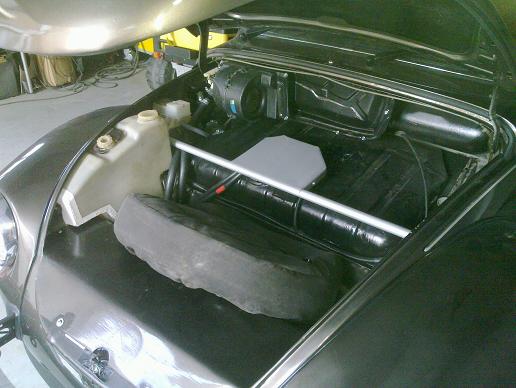 A functional solution for how to fit the VW t25 heater switch to the dash. It has tiny features to try to make up some sort of retaining bracket and even those wouldn't clear properly, the rear end of it was also extremely close to the heater control cables so using some fibreglass filler was an acceptable solution for me. I was able to use the stock VW plug on the back of it and the wire colour coding matched the blower so all good... (the original switch was only a 2 speed which is why I changed it) 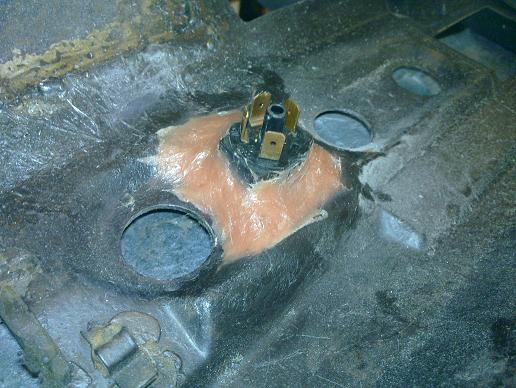
__________________
http://www.ricola.co.uk
|
 |
| Currently Active Users Viewing This Thread: 1 (0 members and 1 guests) | |
|
|


 Linear Mode

