
|
|
#136
 July 24th 2005, 23:19
|
||||
|
||||
|
Yeah I may very well upgrade the power to starter soon - just want to get it running first then sort out a few of the 'new car blues' as I go.
I am planning to install the distro block and crossovers on the left side of the amps. I haven't decided yet whether I will make them a feature in the fibreglass amp surround piece, or hide them under the surround. Becaue on the right side of the amps I want to have room for a fan (for screen demister) and/or tool box as I will undoubtably need it at some stage. I may start working on that later this week or maybe next week. 
|
|
#137
July 25th 2005, 07:19
|
||||
|
||||
|
Time to start thinking of the amp surround - just brainstorming at the moment.
Tank went back in along with -4 breather line from filler neck. Wiring will be tidied up before being hidden behind amp surround (fibreglass). 
|
|
#138
August 24th 2005, 08:03
|
||||
|
||||
|
The underbonnet area will be redesigned shortly as I have obtained a new amp - an Audio Service F4-600:
 http://service.winnet.it/Gttrading4/easysite/scheda3.asp?livello=3&Marchio=Audiosystem&Gamma=Tw ister&Modello=F4>600&pg=1 The two kenwood amps have been sold and rack will be reconfigured to house the distro block and crossovers. Work has been slow lately as we've moved house (to a different city)...so hopefully in a couple weeks work will resume and the f/g cover for the amp etc will be started.
|
|
#139
August 24th 2005, 14:07
|
|||
|
|||
|
Dasdub, how difficult was it to remote mount the WSW fuse box under the rear seat? Did you have enough wire in the WSW kit or did you have to purchase extra? I was planning to do something similar with my car and would appreciate any tips you can provide.
__________________
Kafer_Mike Build 'em fast...or let 'em sit. Last edited by Kafer_Mike; August 24th 2005 at 14:16.
|
|
#140
August 24th 2005, 17:54
|
||||
|
||||
|
Very easy to mount it under the seat - I just made a MDF support box that was sikaflexed to the floor to mount it on. I only had to extend a couple of wires which wasn't hard. They give heaps of wire to allow for either an under bonnet or under seat mounting position. Makes it all pretty clean in my opinion.
|
|
#141
September 18th 2005, 05:39
|
||||
|
||||
|
Anyway, now a few of the shows are over for a little while (picked up a number of awards which was great), got to get back to installing the Audio System F4-500 amp. The amp rack had to be redesigned for the new amp - mdf platforms will be used as a base for cover pieces to hide wiring etc.
Steel frame will be used to mount mdf skeleton over which fibreglass will be laid for some nice curves. Power distribution block and crossovers will also be integrated (still to finalise that part of the design!). 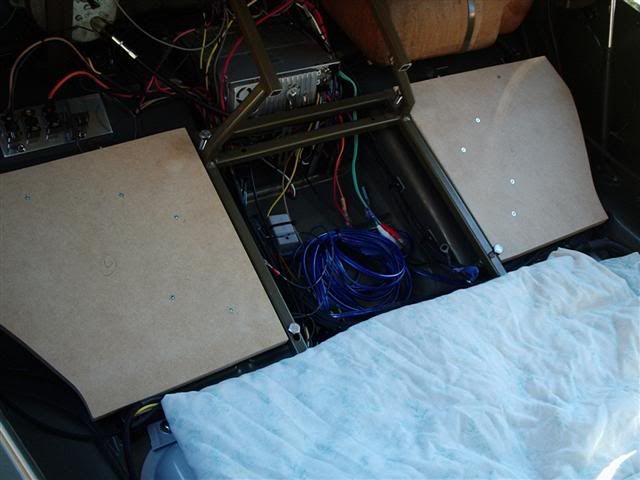 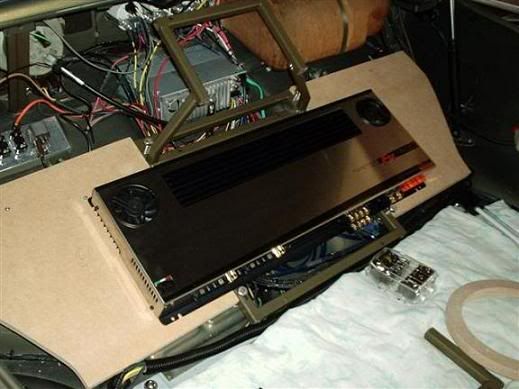 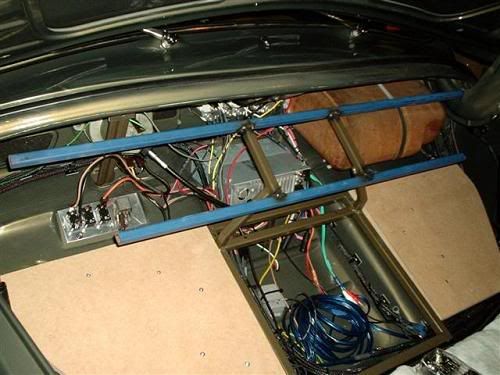 More pics to come once I get a bit more done!
|
|
#142
September 18th 2005, 13:00
|
||||
|
||||
|
Looking good! I was wondering when you were going to get back on your system?!
Jason
__________________
If I could just get paid for my sleepless nights.... 1960 VW Bug UBRDUB Walkaround 1st Drag Run Dyno Run Oval Ragster-'57 Rag/'04 Boxster S
|
|
#143
September 22nd 2005, 08:32
|
||||
|
||||
|
A little more progress on the amp rack - steel frame is tacked together (welds will be finished later) which will provide the base for mdf skeleton (over which f/g will be laid).
The piano hinge will allow access to amp controls and wiring (additional mdf will be used along with more f/g to tidy up the hinged cover piece). 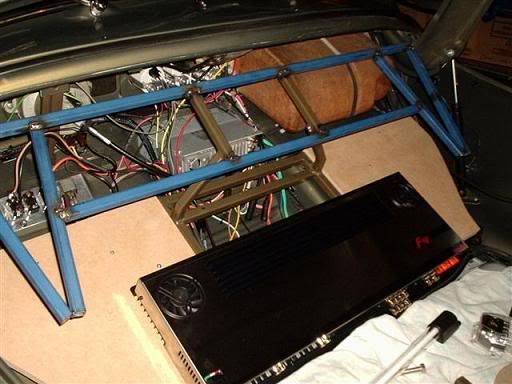 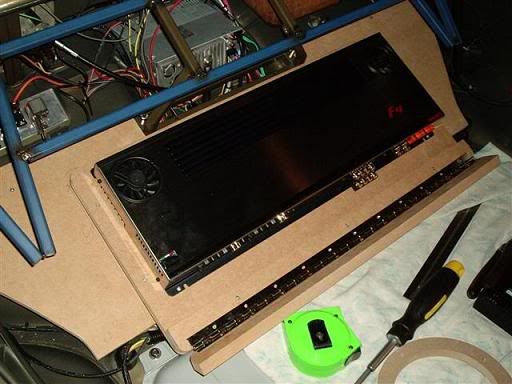
|
|
#144
September 23rd 2005, 23:17
|
||||
|
||||
|
What kind of sound are you looking for with this install?
I worked in car installation for a while at ultimate electronics. I have a single Pioneer SPL2000 12'' competition sub that I had in my bug at the time hooked up to a BD1000 running it at 1 ohm gave it close to 1400 watts RMS and we hit 151.8 db's with the single sub in a slot ported box. The only single sub that I know of that'll play that loud. It made me cry with feeling no emotion...only pain. If anyone has heard 115 db's of bass, its too much. When we played it in the install bay, it would shake my coffee mug in the office 300 feet away. We also had an infinity Kappa perfect 12.1 in my bug with Infinity's 600 watt mono sub amp, Plenty of power with a nice clean hit. The Pioneer sub was pretty much only when you want to listen to loud noises, not music aka little jon. Everything looks great so far. Keep up the good lookin' work. Keep us posted.
__________________
1974 type 1 Turbo 6 piston brakes at all corners  Project is taking all my money and it's all Germanlook.com's fault! 98' Audi A4 93' T-Bird (oh yeah!) 90' 911 C2 74' beetle
|
|
#145
September 24th 2005, 06:53
|
||||
|
||||
|
WOW - 151dB - that is f'ken huge!! I am more interested in SQ rather than pure SPL. This is my first real audio system so I have tried to keep it fairly simple whilst using as good quality components as possible (Within budget).
As is usually the case, plans have changed as I have progressed with the construction. Originally the little rounded skeleton pieces were going to be used as the frame over which fibreglass would be laid - however as I trial fitted them up I kinda liked the exposed look. So I decided to use them as a highlight and add thin mdf to the inside to cover the amp controls and power/ground wires etc. The piano hinge allows easy access to the controls/fuses. The MDF will be painted in body colour with some carpet underneath. 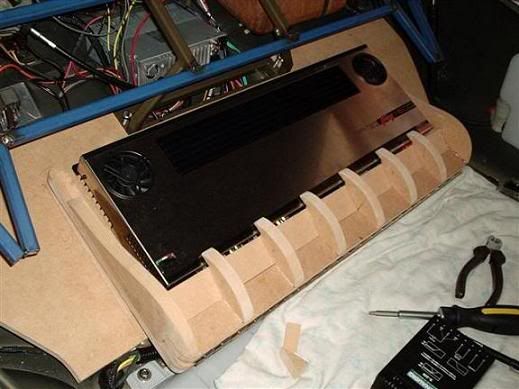 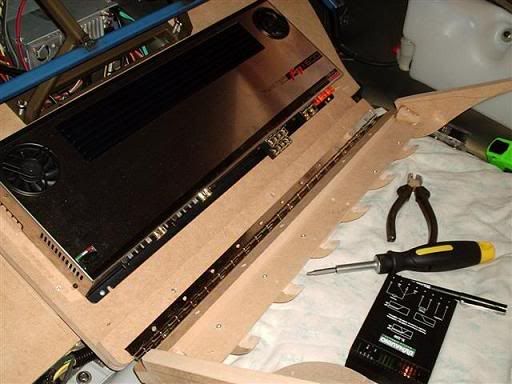
|
|
#146
September 25th 2005, 14:21
|
||||
|
||||
|
That's going to look VERY nice. I'm really impressed with how artistic you've been with the whole thing, I tend to thing the same way. It will be a work of art when it's done, and I'm sure it will sound as good as it looks!
Jason
__________________
If I could just get paid for my sleepless nights.... 1960 VW Bug UBRDUB Walkaround 1st Drag Run Dyno Run Oval Ragster-'57 Rag/'04 Boxster S
|
|
#147
September 27th 2005, 07:42
|
||||
|
||||
|
Cheers Jason
Nothing too exciting today (I know you'll probably be getting sick of reading about this resto) :P Started sorting out the carpet surrounding the amp rack etc - photo is pretty blurry but you get the idea. It will be all tidied up once the rack goes back in place (which will cover the dynaudio crossovers as well). 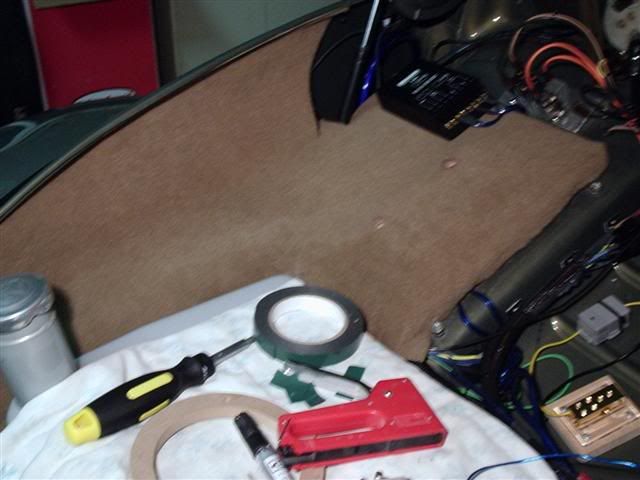
|
|
#148
September 28th 2005, 07:44
|
||||
|
||||
|
Managed to finish up the carpet around the amp rack - not perfect but tidies it up quite nicely. Windscreen washer is finally hooked up and working.
Wiring from crossovers to splits is done (just have to wire amp to crossovers) - 1/0 gauge power cable will be routed to stinger distro block (to be mounted at top tier of rack in centre). 4 gauge will be routed to amp, and second run to small unfused distro block to provide power for the HU, and neon/s. 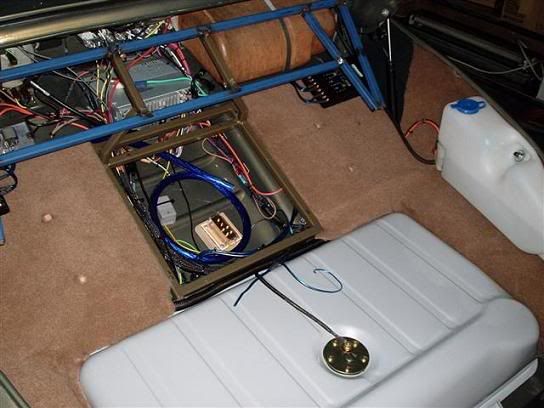 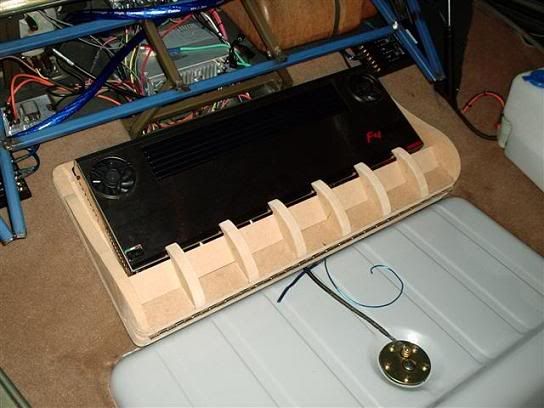
|
|
#149
October 1st 2005, 12:54
|
||||
|
||||
|
Sup Dub
long time no post from me.. Your Bug is lookin as sick as ever.. You know the SPL cap for an SQ system is 135dB I think you can hit that no prob.. and with the Dyns in front you'll have no truble hearing anything.. Say what amp is that you had a Kenwood before.. & your router work ( or jig) is great.. hope your enjoying your New car.. Peace Troy
__________________
SOLD!! 65 Bug 1835cc,Duel Dell 34's,BMD Serp Belt, A1 Perf. Sidewinder,CompeUfire Pointless Ign 95A Alt,CSP Valve Covers,Randar Diego 16's Soon [URL=http://www.cardomain.com/id/troy_audio]
|
|
#150
October 3rd 2005, 06:30
|
||||
|
||||
|
Hey Troy - cheers mate. The amp is an Audio System F4-600 Twister series. It can supply 2 x 460W RMS @ 4ohm - here is a link to some details:
http://service.winnet.it/Gttrading4/easysite/scheda3.asp?livello=3&Marchio=Audiosystem&Gamma=Tw ister&Modello=F4>600&pg=1 Well, as if you hadn't figured already, this sort of thing takes a lot of time! First the base for the top tier was cut from mdf and edges routed. The hole up the top is just to provide some back lit illumination through the plastic Stinger distribution block (from underneath the base). Second pic shows the amp and its ridged cover plate (hinged for access to amp controls), along with distro block in place. Last pic shows the 'bones' which will form the shape of the upper tier - these will be secured in place via hot glue then fabric stretched over them to which the fibreglass can be applied. Hopefully more to come soon. 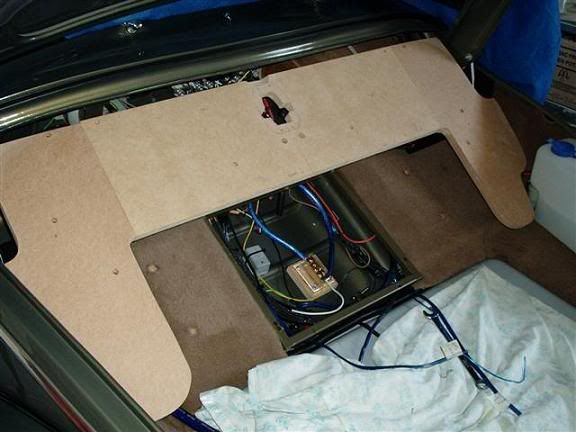 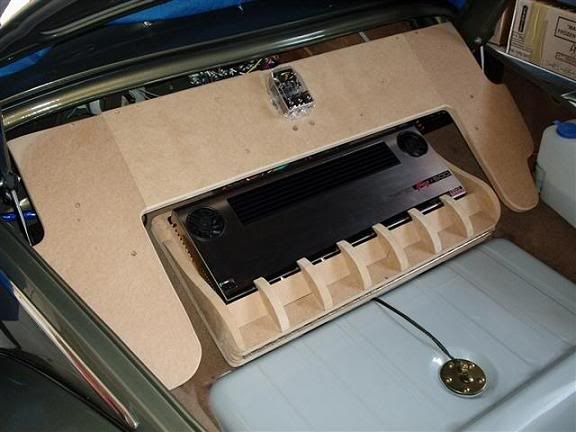 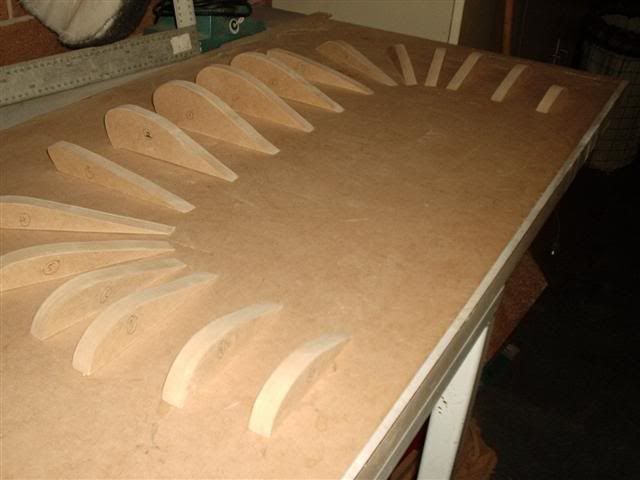
|
 |
| Currently Active Users Viewing This Thread: 1 (0 members and 1 guests) | |
|
|


 Linear Mode

