
|
|
|
|
#1
 December 15th 2006, 00:24
|
||||
|
||||
|
Hi everyone,
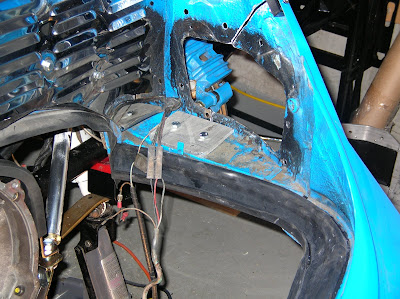
I will try to make myself clear and detail how I did my removable apron that includes adjustment access for carbs (as typical dub setup of pair of dual webers or dells makes them virtually impossible to adjust in place). I will be very detailed, exactly the kind of info I was desperate to find before getting in but without success. Hoping this will be useful for someone around. Here is the step by step method I used: 1- Remove rear fenders and the sealing rubber between the engine and the engine compartment. 2- Draw the carb adjustment windows required. Mine measure 4.5x9 but depending on your application, they can vary from 4 to 6 wide by 8 to 9 long. 3- Cut the opening carefully avoiding touching anything on the other side, like say, CARB or fuel line...  Keep the cutouts, youll need them. At this point, it should look like this (minus the parting, of course): Keep the cutouts, youll need them. At this point, it should look like this (minus the parting, of course): 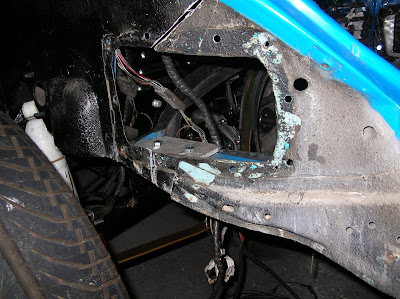 4- Form a plate to bolt around the opening. I did mine from an aluminum plate ¼ thick of 8x11 (make sure to have 1 around wider than the opening). It require bending to fit the body profile, you can use the cutouts as a guide. Drill mounting hole around the plate and in place. 5- Drill the final carb adjusting opening in the plates. Make them smaller than the cutout that youll be using for cover. I drilled and tap for #10 screws and sealed with seam and joint sealer. Cover finished: 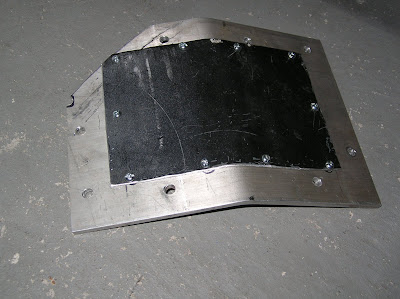 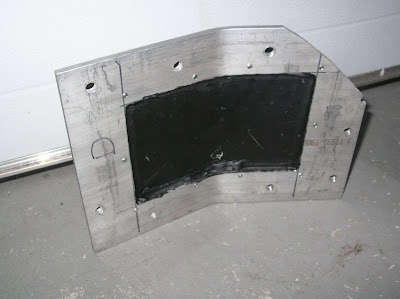
Last edited by martilo; December 15th 2006 at 01:13. 
|
|
#2
December 15th 2006, 00:25
|
||||
|
||||
|
Howto: Removable apron (including adjustment access for carbs)
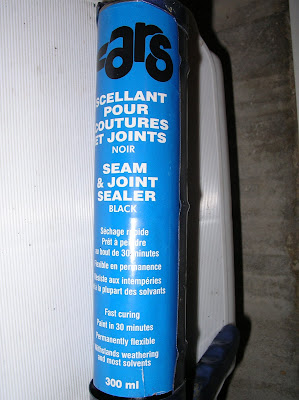
You can find the seam and joint sealer in any autopart shop:
 6- Draw the cutting line making sure to have enough clearance to pull the engine out with carbs on while minimizing the visible part of the cut between the hood and the fender joint. Also make sure to keep enough surface on both sides for bolting everywhere along the cutting line. 7- Since I was a bit concerned to modify the original geometry of the assembly with the hood latch, I first made a pair of mild steel pieces (1”x0.5”x3”) with two holes drilled and countersink for M8 screws: 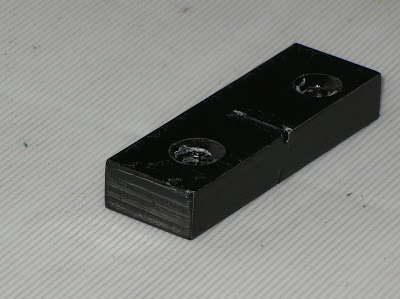 8- Mark the location of the holes on the surface where the hood seal is seating with one hole on both sides of the cutting line and drill. Assemble the piece in place and tight the screws so that the sheet metal takes the form of the countersink. This will keep the location of the apron assembly when it will be cut loose. 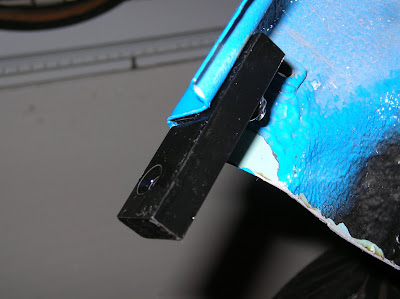
Last edited by martilo; December 15th 2006 at 15:10.
|
|
#3
December 15th 2006, 00:26
|
||||
|
||||
|
Howto: Removable apron (including adjustment access for carbs)
9- With the 2 locating pieces installed, cut the apron loose along the line. Remove the screws keeping the apron in place. Apron on the floor! That should look like this (note the locating piece in place):
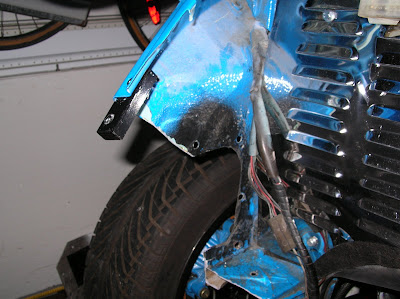 10- I kept the cutouts of the aluminum plates to complete the assembly. I used many, many M8 bolts with 1” flats. As any project of that sort, it’s much overdesigned and can probably support the entire car weight, but, what the heck! 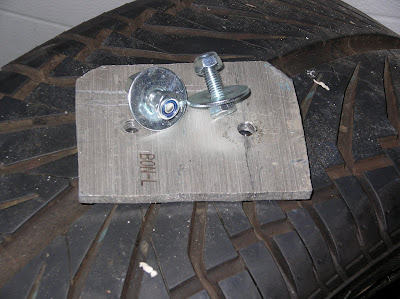
Last edited by martilo; December 15th 2006 at 00:37.
|
|
#4
December 15th 2006, 00:27
|
||||
|
||||
|
Howto: Removable apron (including adjustment access for carbs)
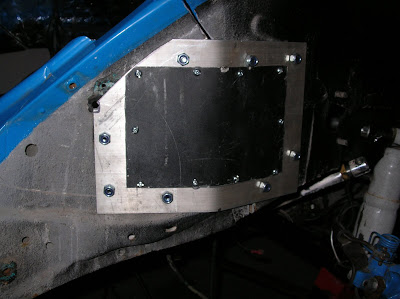
See the plate horizontally mounted inside the engine bay on the next pic:
 11- We’re almost done, seal the plate with the seam and joint sealer and bolt in place. I use the sealer also along the cut. That’s it, final result bellow: (note its only mocked up on the pics and not finally tightened and/or adjusted, thus the cut look wider than final) 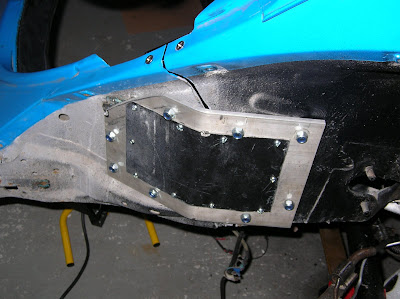 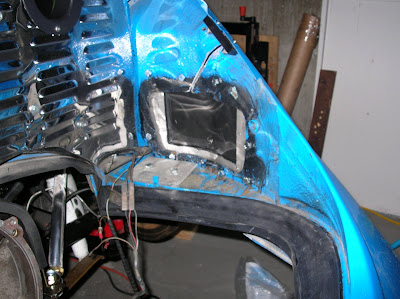
Last edited by martilo; December 15th 2006 at 00:39.
|
|
#6
December 15th 2006, 12:35
|
||||
|
||||
|
Looks like a clean job. You have some good ideas, and fab skills. Thanks for posting this.
__________________
1970 T1 W/MassIVe 2913cc RAT/?EFI? w/direct fire (very soon) and 915 trans  1962 SC 1776cc SP 944NA brakes, 993 wheels VKG
|
 |
| Currently Active Users Viewing This Thread: 1 (0 members and 1 guests) | |
|
|


 Hybrid Mode
