
|
|
#17
 December 19th 2007, 23:46
|
||||
|
||||
|
Thanks..
I will have the rest of the pics and notes up shortly.. Little under the weather these past few days.. passing a cold/flu between son and wife.. But appreciated the comments Alex
__________________
Alex Olaverri Sales Associate for Bug@5-Speed (US) Email: Bugat5speed@yahoo.com Tele: 973 204-5463 
|
|
#18
December 20th 2007, 22:19
|
||||
|
||||
|
Slide 60- Type I IRS Chassis Prep
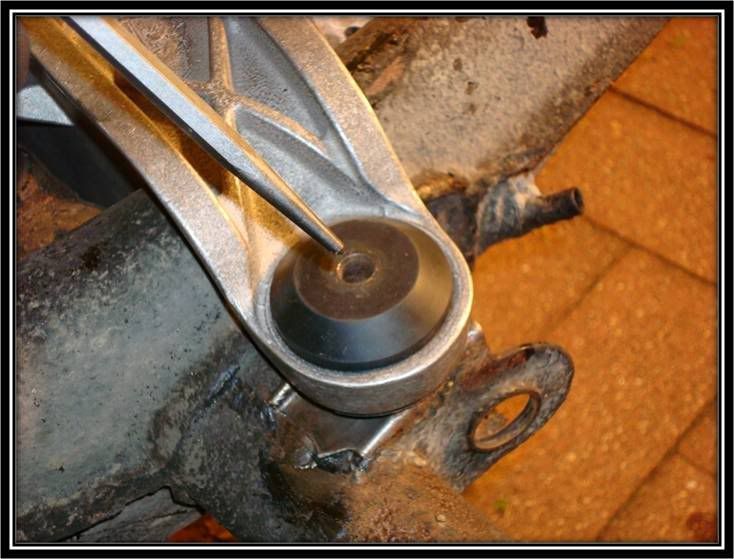 A center punch and hammer are utilized to mark the location for drilling. Starting with a smaller (approximately 6mm or ¼ bit) make the necessary pilot hole Note: Remember to use cutting oil, and eye protection Slide 61- Type I IRS Chassis Prep 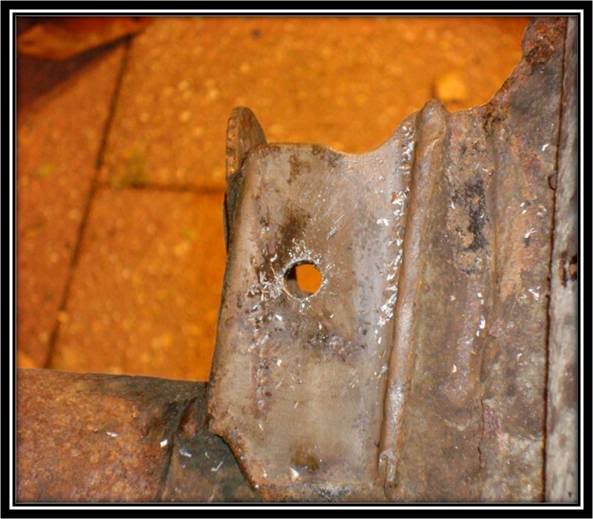 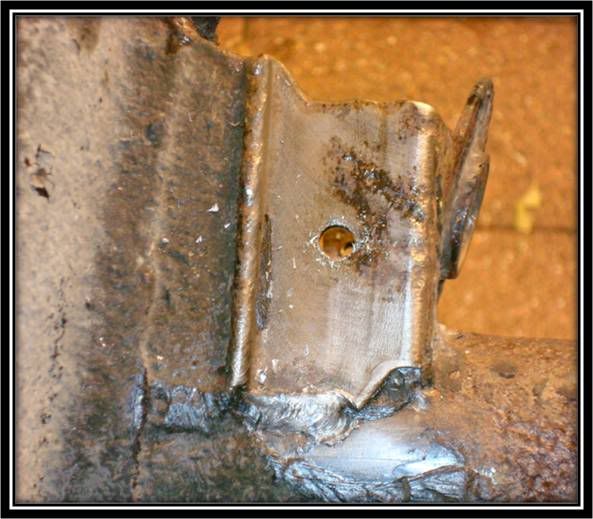 Final hole will be made with a M12.5 or M13 Drill bit. The Front traverse will be attached to the IRS mounts using a M12 Bolt (19mm), two washers, and the supplied metal wedges. Slide 62- Type I IRS Chassis Prep 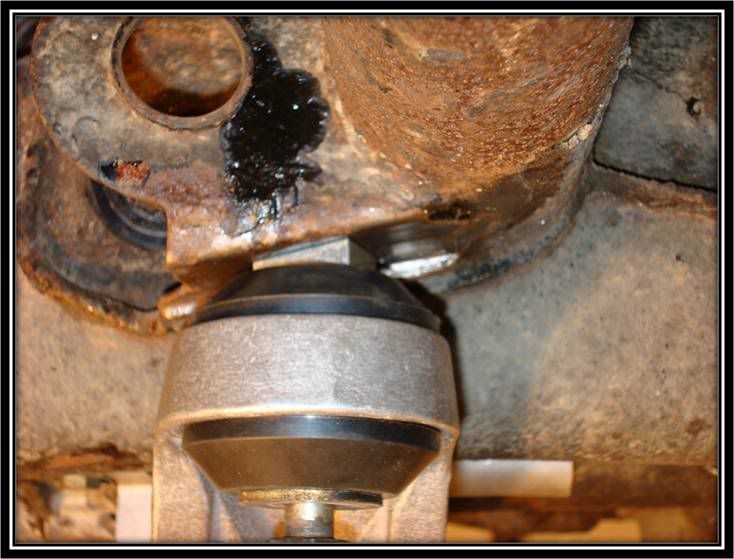 The wedges are provided to create a level surface for the mount to go onto. 4 wedges are included in the kit. Slide 63- Type I IRS Chassis Prep 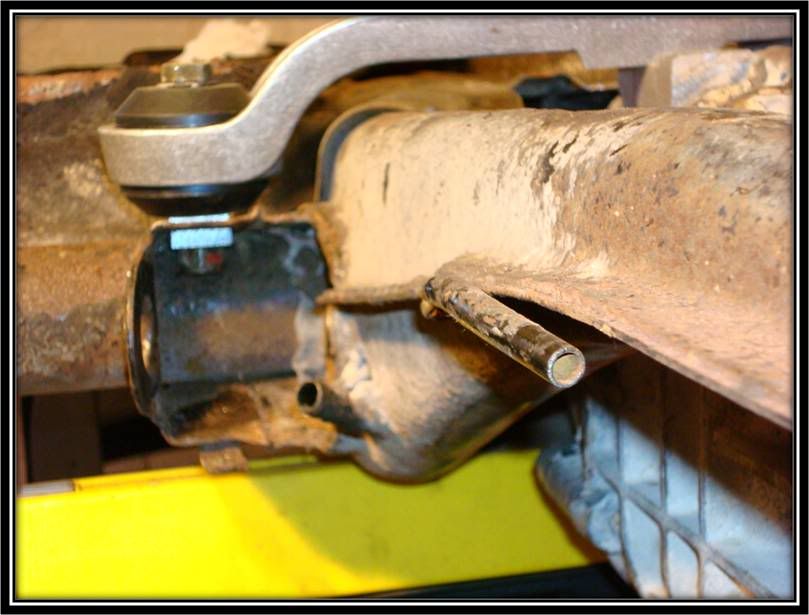 You will notice the location of the second wedge on the back side of the IRS mount. Using M12 hardware, secure the bolt with a lock not and some thread lock Slide 64- Type I IRS Chassis Prep  Picture of what the under side of the chassis should look like. With gearbox partially secured and all the trimming, cutting repositioning and clearance now complete, it is a perfect time to check everything once more. Slide 65 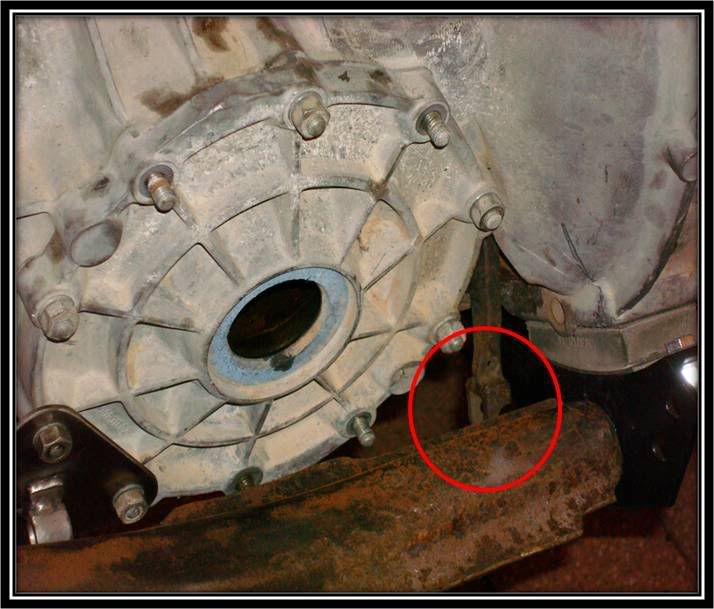 The Knurled Extension bit is utilized due to the stock cable being to short. Make sure you attach the extension with some grease to ensure smooth operation and adjustment
__________________
Alex Olaverri Sales Associate for Bug@5-Speed (US) Email: Bugat5speed@yahoo.com Tele: 973 204-5463
|
|
#19
December 20th 2007, 22:22
|
||||
|
||||
|
Slide 66- Type I IRS Chassis Prep
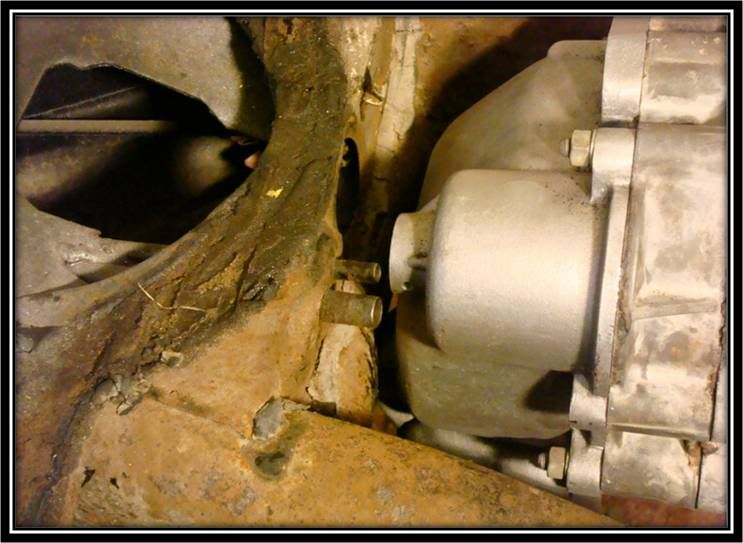 You will notice with the gearbox installed that the clutch cable tube that exits the rear of the transmission tunnel is not properly aligned to mate with the new adapter plate Maintaining this exit angel will cause the tube to interfere with the gearbox, Bowden tube and the clutch cable. This will need to adjusted/modified. Slide 67- Type I IRS Chassis Prep The clutch guide tube is held in place with a strong weld from the factory Utilizing a metal drill or Dremmel along with a steady hand, break the weld and tube free. A sharp chisel will a great help, too. Using a suitable-sized punch, metal rod or piece of steel bar, you then carefully bend the tube, thereby realigning the exit angle of the cable. A new spot will be needed to retain the tube at this new angle Note: Care must be taken to not damage the tube when removing the factory welds, as any dents or kinks may cause clutch cable interference A trial assembly of the re-routed Bowden Tube (flexible clutch cable conduit) from the back of the chassis is checked on last time. Need to ensure a smooth curve with no tight angles is necessary
__________________
Alex Olaverri Sales Associate for Bug@5-Speed (US) Email: Bugat5speed@yahoo.com Tele: 973 204-5463
|
|
#20
December 20th 2007, 22:27
|
||||
|
||||
|
Bug@5-Speed Shifter Install
Slide 68- Bug@5-Speed Shifter Install
Our Shifter Guide goes into more detail, but here are some pics of a partial install. More to come, as some details may not be clear. Such things as modification to Bug and 911 Shifter Rods, Porsche coupler, where to locate your shift rod, and any modications required. Following slides are just to high light some of the install. Slide 69- Bug@5-Speed Shifter Install 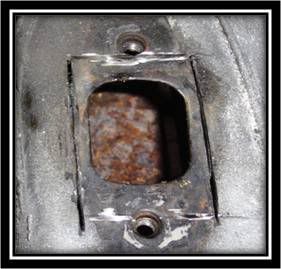 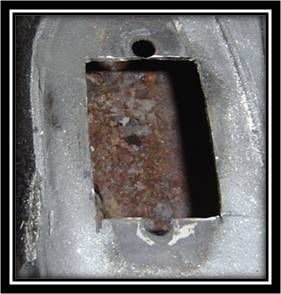 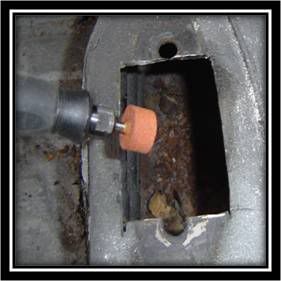 Installing of the shifter onto tunnel is relatively simple (1) Remove old beetle shifter (2) Make template of the base of the Bug@5-Speed Shifter, and trace this onto tunnel (3) Using a cut off wheel or similar type tool cut the necessary 50 x 78 mm for the new shift lever into the tunnel (4) Finish off by grinding edges to crate smooth finish Slide 70- Bug@5-Speed Shifter Install 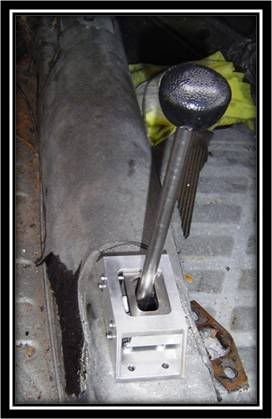 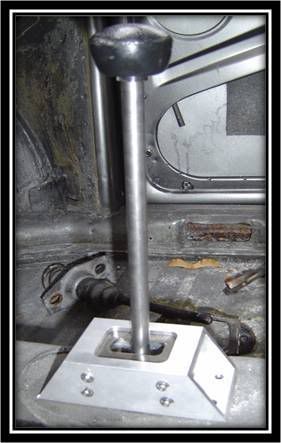 Next, you will need to tap 4 holes onto the tunnel to install the supplied (4) hex bolts Lastly Install shifter as shown in pictures onto the tunnel and secure utilizing the (4) hex bolts Following instruction in shifter guide for adjustment and alternatives modifying the beetle tunnel shifter rod Slide 71- Bug@5-Speed Shifter Install 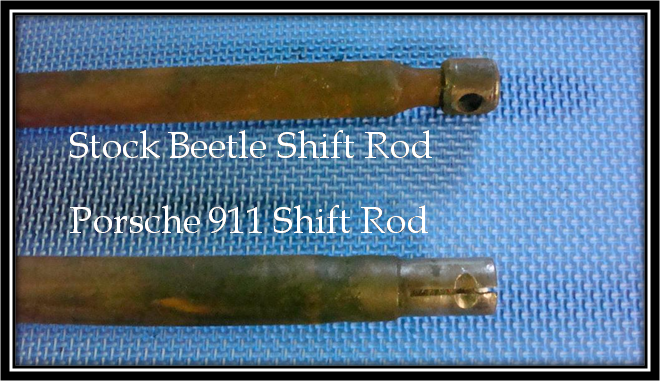  Here you see the difference between the factory stock beetle shift rod, and the 911 shift rod option. Lower picture shows where the Porsche coupling would slide into the 911 shift rod.
__________________
Alex Olaverri Sales Associate for Bug@5-Speed (US) Email: Bugat5speed@yahoo.com Tele: 973 204-5463 Last edited by Bug@5speed(US); July 17th 2008 at 21:28.
|
|
#21
December 20th 2007, 22:29
|
||||
|
||||
|
Ok, that's it for now..
I was talking to a fellow about another chasis, to avoid replacing my pan head, but I think he fell off the planet. Did start to remove the napolean hat, so if I don't hear from him, I will continue to upload and post pics of the pan head job. Take care and happy holiday's Alex
__________________
Alex Olaverri Sales Associate for Bug@5-Speed (US) Email: Bugat5speed@yahoo.com Tele: 973 204-5463 Last edited by Bug@5speed(US); July 17th 2008 at 21:29.
|
|
#22
July 17th 2008, 21:31
|
||||
|
||||
|
A few new updates on this guide.
New pics of the Bugat5speed Inner Shifter rod (Slide 15), Modified TOB Fork (Slide 16), and a few pics to show the difference between 911 and Beetle Shift Rods (Slide 71: The one in the tunnel) VR Alex
__________________
Alex Olaverri Sales Associate for Bug@5-Speed (US) Email: Bugat5speed@yahoo.com Tele: 973 204-5463
|
|
#24
July 15th 2009, 22:02
|
||||
|
||||
|
I am happy to report, that I should be getting my chassis back from Metricautohaus very soon.
I will update thread with more pics once I have her in my hands.. Stay tuned Alex
__________________
Alex Olaverri Sales Associate for Bug@5-Speed (US) Email: Bugat5speed@yahoo.com Tele: 973 204-5463
|
|
#25
October 3rd 2009, 07:33
|
|||
|
|||
|
Quote:
  wish id seen it ages ago!! wish id seen it ages ago!!i have my engine in starting etc etc but cant get the clutch cable to move much as its hitting side of gearbox casing. i have bent the throw out arm slightly with oxy acetylene.... but there doesnt seem to be the right movement of the arm in the case.... it doesnt seem to move right? could you throw up a picture of the way the arm should be installed in the case? and the bits for it? is it easily bent or a bugger??  cheers oh great gearbox one!  
Last edited by buggyboyshane; October 4th 2009 at 17:34.
|
|
#26
October 4th 2009, 20:40
|
||||
|
||||
|
buggyboyshane
Just got back from a trip, give me a day or so, and will update you.. Also PM your email address. Alex
__________________
Alex Olaverri Sales Associate for Bug@5-Speed (US) Email: Bugat5speed@yahoo.com Tele: 973 204-5463
|
|
#27
November 18th 2009, 00:01
|
||||
|
||||
|
details for early 901 install.
hey guys, can you show some images that outline your "Early 901" rear support part? In looking at your install images you show the part, but not how it mounts to the trans. that might help me make a decision about purchasing or fabricating... Also can you PM me the cost for this part?
thanks.
|
|
#28
November 18th 2009, 10:52
|
||||
|
||||
|
JMD,
Sure, will try to upload tonight.. Alex
__________________
Alex Olaverri Sales Associate for Bug@5-Speed (US) Email: Bugat5speed@yahoo.com Tele: 973 204-5463
|
|
#29
July 13th 2010, 10:41
|
|||
|
|||
|
Hi,
This is a great post, and all this time I was wondering why no one had made such a guide... Many Thanks... I do have one question remaining, is it wise to leave the tunnel open so widely where the coupler goes? Why not make a little piece of metal to cover it up a little and protect it from rain, dust, ... ? Sebastien
|
|
#30
July 13th 2010, 23:01
|
||||
|
||||
|
Scourtaud,
The width is dependant on the couper you use.. A few members have made some tweaks to add covering to the exit point. I don't recall there specific names, but if you search you will get some nifty ideas. Really boils down to what your fabrication capabilities are.. think of the above method as path of least resistance to getting the capability (gearbox to connect to the shifter), but it has been noted that improvements can be made.. and based on your skill they can range from mild to wild. VR ALex
__________________
Alex Olaverri Sales Associate for Bug@5-Speed (US) Email: Bugat5speed@yahoo.com Tele: 973 204-5463
|
 |
| Currently Active Users Viewing This Thread: 1 (0 members and 1 guests) | |
|
|


 Linear Mode

