
|
|
#256
 March 12th 2012, 22:45
|
||||
|
||||
|
Don't worry about the windows, both of my lexan windows bow in, though mine are worse than yours.
Also, learn from my mistake and make sure your oil tank is grounded or the sensor won't work  It took me a bit to realize my tank was fully isolated. It took me a bit to realize my tank was fully isolated.As for the lights I say go for the piaas even if you have to buy them still. The aesthetic difference and light stability are probably worth it. Thanks for the tip on the gkn parts, I'm gonna raid their catalog for porsche 100mm fitments and see what I can find.
__________________
Lucy: 73 super beetle sport bug edition, 944 turbo suspension, 930 turbo brakes, 2165 FI, dry sump, turbo 
|
|
#257
March 13th 2012, 04:17
|
||||
|
||||
|
Quote:
Quote:
Years ago a buddy installed a water temp sensor by putting an aluminum section in the middle of the rad hose. Worked great, even without a ground wire...for a few hours then stopped. Then a leak started. The sensor was grounding through the coolant, and caused some sort of reaction that ate away all the brass! I always check now to make sure I don't ground through fluids. GKN boots for 100mm CV's: MS5K023 - 99mm mounting I.D., 86mm bolt circle, 22mm shaft opening, 8.2mm bolt hole diameter. 'Fast' boot and plate to suit 100mm CV joints and tripod housings (no indents). MS5K012 - 99mm mounting I.D., 86mm bolt circle, 22mm shaft opening, 8.2mm bolt hole diameter. 'Fast' boot and plate to suit 100mm CV joints and tripod housings. MS5K024 - 99mm mounting I.D., 86mm bolt circle, 22mm shaft opening, 8.2mm bolt hole diameter. 'Fast' boot and plate to suit 100mm CV joints and tripod housings (with indents). MS5K032 - 88mm mounting I.D., 86mm bolt circle, 22mm shaft opening, 10.2mm bolt hole diameter. 'Fast' boot and plate to suit 100mm CV joints and tripod housings (with indents). I *think* based on the diagram that the indents allow for CV balls coming up higher then the flange level. -Dave
__________________
'71 Type 1 - Rally Project '58 Type 1 - I bought an early!?! '73 Type 1 - Proper Germanlook project '68 Type 1 - Interm German 'look' project '75 Type 1 - Family Heirloom '93 Chevy 3500 pickup - Cummins Swap
|
|
#258
March 13th 2012, 04:41
|
||||
|
||||
|
Alrighty! Back into the garage, though this time I think the post is better if I start with the finished product first, and then show the work behind it:
 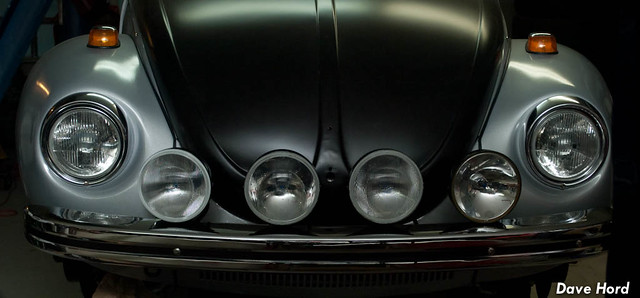  Some nights I think my roomate and I should open up a rally shop. The PIAA lights mounted to the car? Yeah, those came out of our "spares" collection :P Two of the lights were used on my '69 beetle, one is brand new, and fourth is a light that was on his Subaru but gave up it's lens to the gravel gods. So, if I simply get a replacement lens for the lamp, I have four. Looking at the photos though, they seem small. Don't get me wrong, they "suit" the car, and I'm not going to change out for the larger set. They just don't scream "80's Group-B Rally Lights!!" like my previous Audi did :P Throughout the mounting process I was continually thankful I decided to run with the smaller 6" lights, vs. the 8.5" Bosch 220's. Fitting these was enough of a pain-in-the-butt that I wouldn't want to try the 225's. The factory cars all seem to be drilled right through the bumper, but I have no idea what they did 'inside' the bumper to take the weight and keep the lights from shaking. Mounting rally lights requires two basic steps: 1) The lights must be 300 times more secure against vibration then you think they should be. And 2) make the lights removable if possible. There is nothing worse, and more tiring, then lights that shake and vibrate while running off road. The strobe effect is distracting and tiring. Removable lights means you don't risk wrecking the lights during the day, and thus blowing any chance you had at night. With that in mind... Lights follow the curve of the bumper/front of the car...  ...but are not actually mounted to the bumper. I used 1" tubing, and some heavy-duty angle mounts to make a vibration-free setup.  Beginning of bar fabrication:  Mounting plates tack-welded on for testing. The two outside lights were relatively easy, but the two inside lights needed to be moved back towards the rear of the car slowly bit-by-bit to clear the front bumper. Eventually I had to notch the bar (pretty heavily) to ensure that I would be able to get a socket in to adjust the lights. I don't anticipate this will add any vibration issues though.  With that done I cut down the plates to the smallest footprint possible, welded them on fully, cleaned up the corners and gave it a coat of POR-15. Based on the photo above I just realized I probably left a weld too close to the bolt hole, so I'll need to clean and dress that tomorrow and repaint. Once it's dry, mount the lights and finish the wiring. I still had some time before bed, so I took to finishing up some items in the trunk. With the fresh air box mounted, I needed to find a way to join the box to the defrost ducts. Eventually I decided that some aluminized jute padding would probably do the trick nicely...which it does. Problem is it looks like crap! Instead of that space-age look you think it's going to have...it just looks, well, cheap. I know the factory used plastic tubing on the inside, but none of the bits I had fit very well. On the plus side, tonight was the first time I have ever turned on a working Fresh-Air fan that I remember. WHOA!! there actually is some serious defrost air flow! Definitely did not expect that. 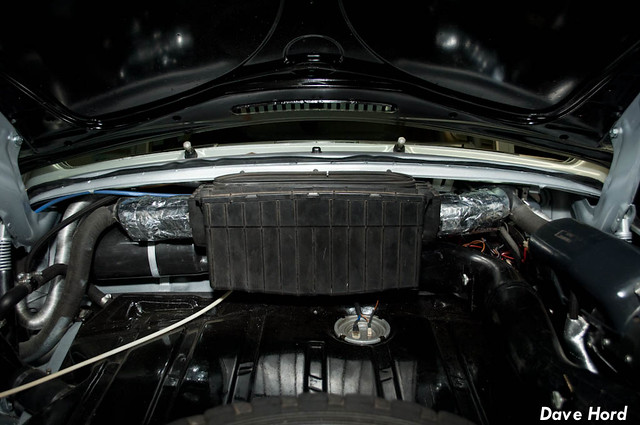 -Dave
__________________
'71 Type 1 - Rally Project '58 Type 1 - I bought an early!?! '73 Type 1 - Proper Germanlook project '68 Type 1 - Interm German 'look' project '75 Type 1 - Family Heirloom '93 Chevy 3500 pickup - Cummins Swap
|
|
#259
March 13th 2012, 06:37
|
||||
|
||||
 Nice work on the rally Lights too man.. could always put some Spray foam in the bumper and shape it and then put that Plastic dip over it....I think it would Help with vibrations and abit of Aero  Chris.
__________________
74 Std. GL 08 Vw rabbit 18 WR250R 07 Chevy 3500 Dually
|
|
#260
March 13th 2012, 11:51
|
||||
|
||||
|
Hi Dave, what's the light patterns - my guess - the two outers are fog wide beam for seeing round corners and the centre two are drive pattern? Did you link the dip onto the main beam? I'm finding that reliable and very useful without the extra auxillaries for the runabout.
Whilst you have solid mounts I always found that spot lamp steadies were a must because even the highest frequency vibrations from the solid mounts caused premature bulb failure.
|
|
#261
March 13th 2012, 13:47
|
||||
|
||||
|
Hi Clive, you got it! Outer lamps will be fog pattern and the inner two will be driving. My preference is actually to have Pencil beams on the inside with driving pattern on the outside, as we don't get the extreme fog banks that you guys get. But pencil beams are no longer available, and I'm working with the lens patterns I already have
All the lights are dipped off the factory high-beam switch, but each of the 3 sets (stock high, fog, driving) are independently selectable on the dash. The top three toggle switches are the lights. Stock high, Driving and Fog lights. When these toggles are up, the lights turn on with the factory high beam. When they're down, flipping the factory high-beam switch won't turn them on. This allows me to be legal in BC when driving on public roads (only four white or yellow front mounting lights allowed), drop down to just fogs in crap weather, use only factory highs if the lights are covered or light up the night sky with all six!If I had mounted the 220's, I would have used some lamp steadies...but I've never found them necessary with Hella 4000's or 6" and smaller lights. I've only replaced a single bulb in 10 years! -Dave
__________________
'71 Type 1 - Rally Project '58 Type 1 - I bought an early!?! '73 Type 1 - Proper Germanlook project '68 Type 1 - Interm German 'look' project '75 Type 1 - Family Heirloom '93 Chevy 3500 pickup - Cummins Swap
|
|
#262
March 13th 2012, 13:53
|
||||
|
||||
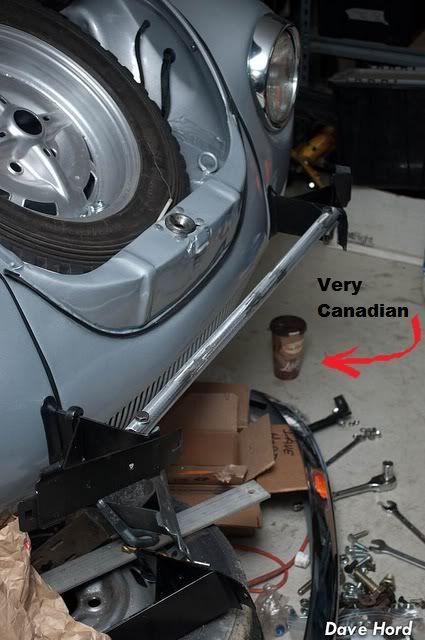 hahahahahaha, so true. I don't need a beer tap in my garage, I need a Tim Horton's dispenser. -Dave
__________________
'71 Type 1 - Rally Project '58 Type 1 - I bought an early!?! '73 Type 1 - Proper Germanlook project '68 Type 1 - Interm German 'look' project '75 Type 1 - Family Heirloom '93 Chevy 3500 pickup - Cummins Swap
|
|
#263
March 14th 2012, 02:24
|
||||
|
||||
|
Alright, I can't find a photo of it but I think we can all agree how your "first car" effects your automotive choices for years to come. The first car that I bought happened to be a 1989 Audi 90 quattro, a car which I still think has the best factory dashboard of any car out there. Even 23 years later the dash is still timeless. One of the best features, for me at least, was the night-time illumination. It was this warm red/orange. To this day I can't buy a car with a dash that lights up green. In my Audi Rally car I used Stewart Warner Gauges and their red LED lighting. It was good, but quite red. When I built the '69 Beetle I needed a way to get the dash to light up my preferred red, but with a mix of bulb types due to the VW speedo and Porsche tach. Anyone who has ever used the rubber "boots" that ship with aftermarket gauges knows they go white within a few weeks of use. Some testing resulted in a simple solution...
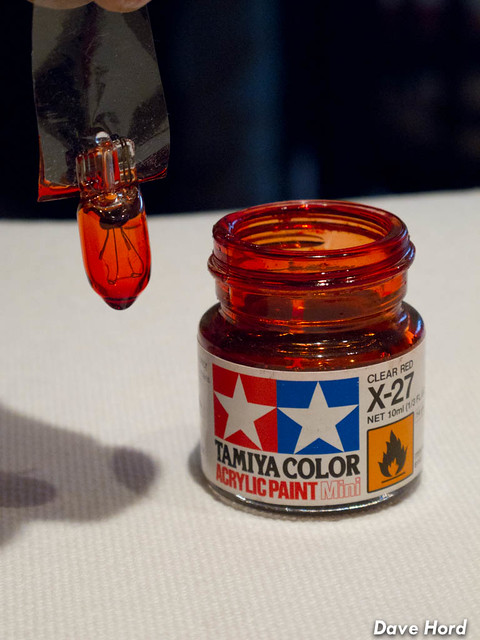 Two coats of Tamiya clear acrylic will give you an even light in the color you choose, keep going with the coats to get the color deeper and deeper. The clear Tamiya paints are available in a whole load of colors, so anything is possible. At night, my Bug lights up pretty well even across all the different gauges I have. Finished up the wiring for the rally lights tonight. Everything was setup waterproof, but a lot of the wires were visible, so I went nuts with the techflex. Chances are it will get all nasty and I'll be cutting it off in a year...but until then it looks fantastic! :P The wiring is virtually invisible, except for the one loop coming from under the apron up to the light bar.   I've got a replacement lens/reflector coming for the broken unit, but looking at this photo it seems I might need to pickup some high wattage bulbs to replace the yellow H4's in the factory lights! 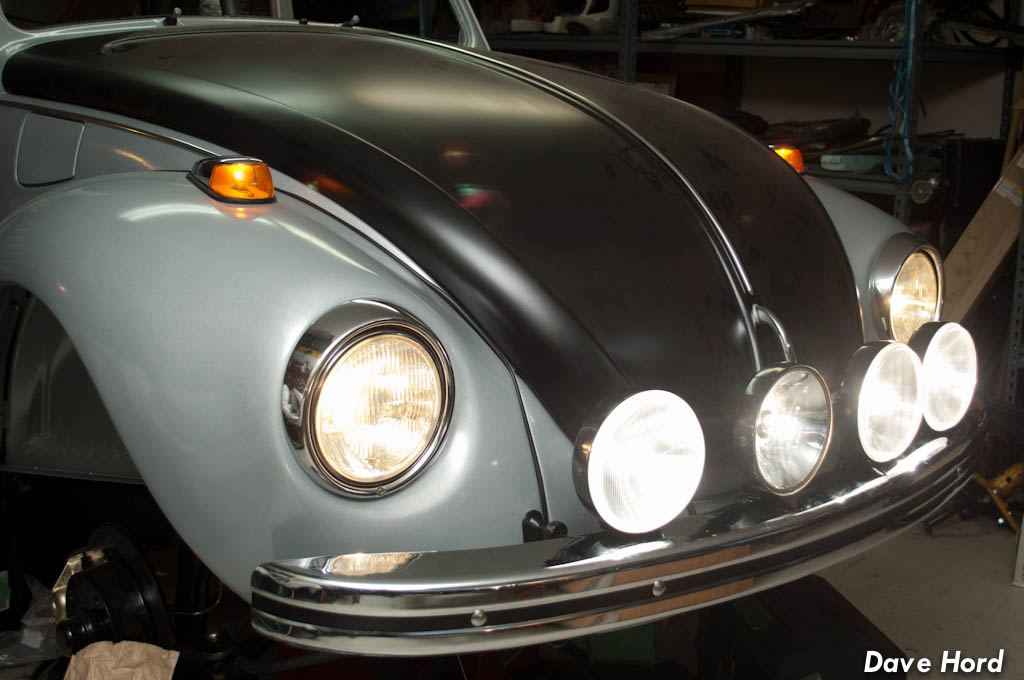 Some buddies dropped by, so we were able to toss the pop-out window into the driver's side. What a pain these stupid things are to install, eh? I do have the hinge cover, I just don't have the correct screws to install it :P 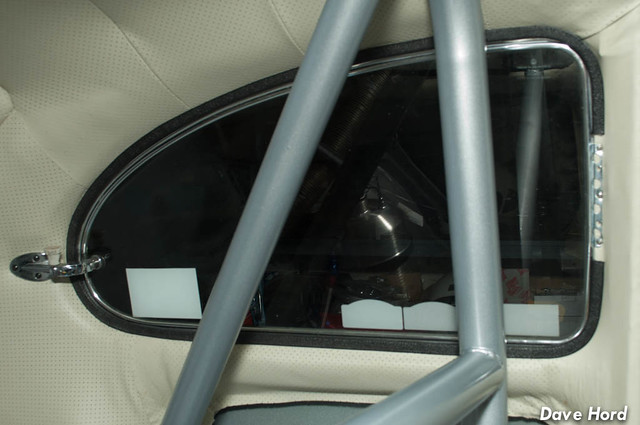 Also this evening, I worked further on the hood lock/latch setup. Last night I had the lock working, made some adjustments and promptly locked the hood shut with no possibility of getting it open. After popping out the spare tire access port, I got the hood open. A few more tries tonight and I ended up with a perfectly working hood latch and lock system. I popped an emergency pull cable in, routed into the front fender. When my buddies showed up I was demonstrating for Scott, who bought my '69, what a factory lock system actually works like (non existent on his '69!). Went to open the hood and the handle in the glovebox broke. ARRRGGG! That's it. %$#! the factory lock, I'm just going to install a set of these to ensure the hood doesn't fly up.  or or  -Dave
__________________
'71 Type 1 - Rally Project '58 Type 1 - I bought an early!?! '73 Type 1 - Proper Germanlook project '68 Type 1 - Interm German 'look' project '75 Type 1 - Family Heirloom '93 Chevy 3500 pickup - Cummins Swap Last edited by owdlvr; March 14th 2012 at 02:52.
|
|
#264
March 14th 2012, 05:21
|
|||
|
|||
|
Dave - fresh air box joining bits - the factory replacement parts that I got are just with a kind of black backing on them that have two pop fastners.
 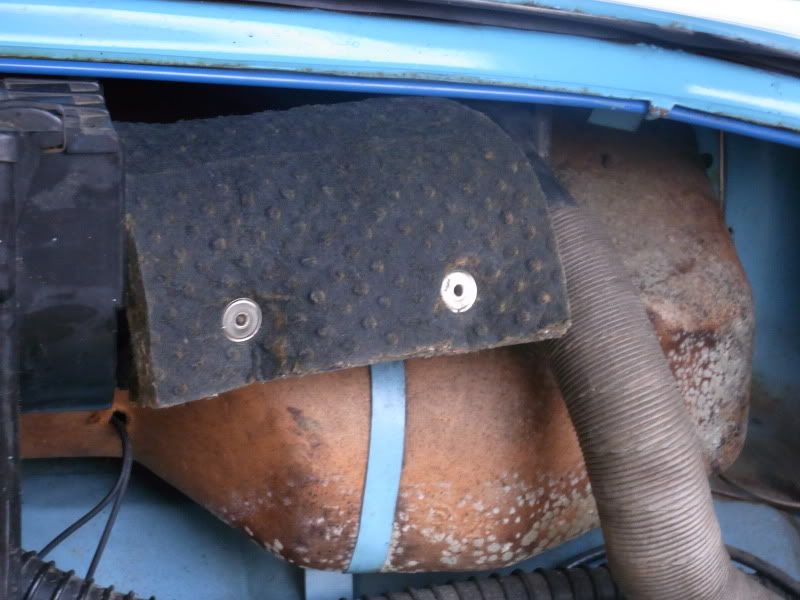 I'm informed that you can use silicone tubing. In black that would tidy up if you were that bothered, think I will be doing this at some point in the future...
|
|
#266
March 15th 2012, 02:31
|
||||
|
||||
|
Quote:
Quote:
The shifter is simply a factory VW shifter with an Empi aluminum short-shift kit. I've modified a prototype Vibrant Performance carbon-fiber shift knob to fit the shaft, and then sleeved the spindly little factory shaft with a carbon fiber tube. I *think* the production Vibrant knob will thread right onto a factory shift rod, but its been 7+ years since I worked there. The carbon tube, in my case, is a cut-down paddle handle which I got from a friend who owns an outdoors shop. ------ Tonight was a quick night, I was in Whistler all day for work and then down in Vancouver for the monthly club meeting. Put my minimum hour in and called it quits. I spent the first bit going around the car and touching up a number of tiny details I have been meaning to get to. Little things, that you'd probably never see but bother me! I think I'm in danger of becoming a perfectionist. Example? The razor I used to put the cut-line in on the plasti-dip before lifting off the paint wasn't brand new, so in a few spots it didn't pull on a perfectly straight line. A little plasti-dip brushed on tonight, and I'll cut a new line and pull off the excess tomorrow. Yes, proof I've gone insane.  With various little jobs done, I figured I should tackle the rear bumper and apron. I knew this wasn't going to be a simple bolt on affair, you may remember I dropped the body off a trailer and the rear apron opening is 1+ inches too narrow now! With the right-side bumper bracket bolted on, you can see how far off the left-side holes are: 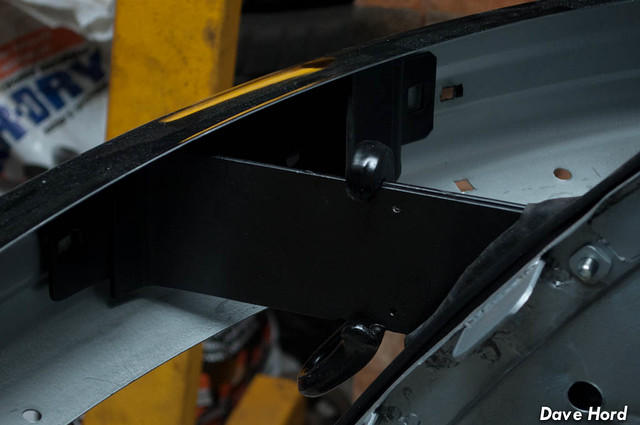 Using a rather dangerous combination of two pieces of wood and a damaged scissor jack, I managed to spread the bumper apart enough to get both sides bolted together...  ...but it's not done yet. For starters, the bumper is slightly shifted to the left and covers more fender on the left side then the right. Normally one would simply loosen the bolts and shimmy the bumper over...but in my case it's currently acting as a stressed member of the rear bodywork. Loosening the bolts without something holding the body spread apart would be a dangerous affair! The second issue is the rear apron opening. The rear apron WAY closer to fitting now, so much so that I'm confident I'll be able to make things work, but it does need adjustment. I'm about 1/4" off at the bottom now, so I think I need to shim the bumper mounts away from the body. This is going to mean removing the bumper, shimming the mounts, stretching the body, attaching the bumper and then testing the apron. Again and again until it fits! Once that's all done, I have to figure out how to center the bumper! In the end, I don't know if I'm going to end up with a removable apron or not. Depends on how close I get it, and how easy it will be to remove. At the very least, even if I have a removable apron I'm not going to be able to remove the bumper. At first thought it seems like "well, whats the point"...but I suppose engine pulls will still be much easier. Let this be a lesson kids: Don't drop the body off the trailer. (but you probably knew that already.) -Dave
__________________
'71 Type 1 - Rally Project '58 Type 1 - I bought an early!?! '73 Type 1 - Proper Germanlook project '68 Type 1 - Interm German 'look' project '75 Type 1 - Family Heirloom '93 Chevy 3500 pickup - Cummins Swap
|
|
#267
March 15th 2012, 14:13
|
||||
|
||||
|
Quote:
Clive
|
|
#268
March 15th 2012, 19:27
|
||||
|
||||
|
Thanks Clive, I'll check out the options as you suggest. I've got a higher-wattage alternator coming, but I'm not sure how taxed I want to make it!
-Dave
__________________
'71 Type 1 - Rally Project '58 Type 1 - I bought an early!?! '73 Type 1 - Proper Germanlook project '68 Type 1 - Interm German 'look' project '75 Type 1 - Family Heirloom '93 Chevy 3500 pickup - Cummins Swap
|
|
#269
March 16th 2012, 19:29
|
||||
|
||||
|
Good to see nice solid mounts with the driving lights.
Nothing worse than shaky driving lights when you hit bumps. I have to run driving lights on all my cars due to the wildlife out here, my bug and 4x4 are great, nice solid metal to mount but my damn Ford Mazda thing being a new modern plastic heap it was like they were sitting in a bucket of jelly. Had to do so much reinforcing to get them nice and steady.
__________________
1974 Germanlook 1303 SUBA-beetle Subaru EJ254, BoostR 17", topline suspension, 4 wheel discs and A/C
|
|
#270
March 17th 2012, 03:34
|
||||
|
||||
|
A short time spent in the garage, before F1 qualifying, but a very productive and satisfying one. For starters, I got this to fit:
 The rear apron isn't perfect, but its at least in the gap! Started off by notching the left bumper bracket mount a little to try and stretch things over. Managed to cut the distance needed by another 1/8". I was off just a little bit, but far enough that there was no stretching or sneaking it in. Hmmm...what to do? Occasionally, when working on a car, a little bit of violence is allowed. I put the apron on my lap, gave it a good shove in the right direction on the left side, and then a good shove on the right. Oh hey, look at that, fits! The best part though, is that I'm going to be able to keep the "removable" feature I intended. I've popped two of the riv-nuts / bolts in, but will need to mark (pray) and do the lower two without the bumper on. This means I've got to be quite accurate, as there will be no testing possible between marking and the first test! 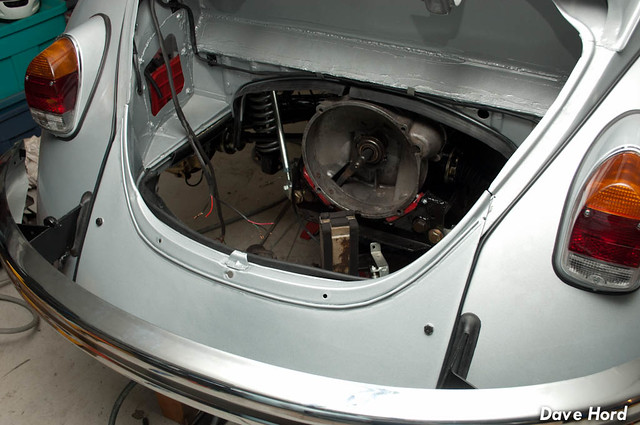 Occasionally one should leave the garage on a good note, and thus start the weekend nice and fresh. Lets hope no one needs to "use" these decals during the Spring Thaw next month!  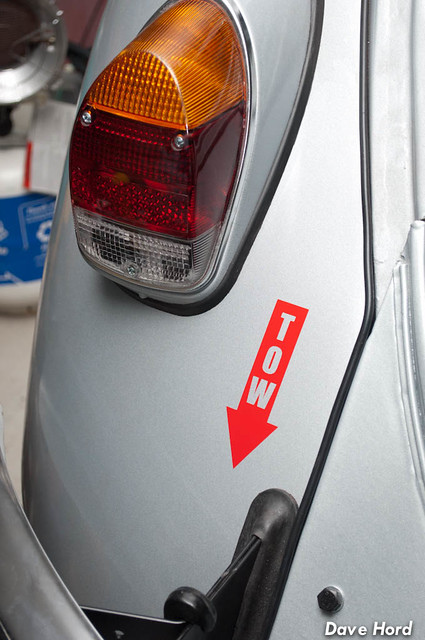 -Dave
__________________
'71 Type 1 - Rally Project '58 Type 1 - I bought an early!?! '73 Type 1 - Proper Germanlook project '68 Type 1 - Interm German 'look' project '75 Type 1 - Family Heirloom '93 Chevy 3500 pickup - Cummins Swap
|
 |
| Currently Active Users Viewing This Thread: 1 (0 members and 1 guests) | |
|
|


 Linear Mode

